A walk-in can fit the room and still fail the kitchen. The racks go in, and the cart can't turn. Friday's delivery doesn't fit on the shelves. The door opens toward the dish station instead of the prep line, and every trip takes extra steps, all day, for years.
So how do you design a commercial walk-in cooler or freezer that fits how your facility actually runs? Work through four decisions in order: the space you have, what you need to store, how your team moves product, and what the operation will need several years from now. Settle those before you request a quote, and the right dimensions mostly decide themselves.
Step 1: Start with the space you actually have
Measure the footprint, ceiling height, and installation path before you choose a size. Then subtract wall thickness. A walk-in's exterior dimensions are not its usable interior space, and the gap widens with every inch of panel.
- Footprint. Measure the floor area, including clearance from walls, drains, columns, and nearby equipment.
- Ceiling height. Account for sprinklers, ductwork, lighting, and any top-mounted refrigeration equipment.
- Installation path. Check every doorway, hallway, and loading area the panels must pass through to reach the site.
- Floor conditions. Note slope, floor drains, and whether the walk-in will sit on an existing slab or need its own insulated floor. Freezers generally need an insulated floor.
- Utilities. Locate power and plan the route for refrigeration lines and condensate drainage.
Interior vs. Exterior Dimensions
Exterior dimensions are the space the walk-in takes up in your building. Interior dimensions are what's left for shelving, product, and people once the walls, floor, and ceiling are in place.
The difference adds up fast. Thermo-Kool walk-ins use four- or five-inch foamed-in-place panels. With a 10-by-10-foot exterior footprint, four-inch walls leave an interior about 9 feet 4 inches square, or roughly 87 square feet of floor area. Five-inch walls leave about 84 square feet. The same math applies vertically, since an insulated floor and ceiling both reduce the interior height.
That's why panel construction belongs in the planning conversation, right alongside the room itself.
Step 2: Calculate what you need to store
Size a walk-in for peak inventory, not average inventory, and plan for shelving and aisles rather than empty floor. Start with what arrives, how often, and how it's packed. Then work out the shelving it takes and the room people need to reach it.
- Peak inventory. List what you hold at your busiest point: after the largest delivery, before a holiday, or ahead of a big event.
- Delivery frequency. Fewer, larger deliveries need more storage than daily drops of the same weekly volume.
- Product mix. Separate what needs refrigeration from what needs freezing. This decides whether you need one walk-in, two, or a cooler/freezer combination with a shared wall.
- Packaging. Cases, crates, bulk bags, and sheet pans fill shelving differently.
- Shelving and racking. Convert inventory into shelf length and depth, then fit the shelving to the interior dimensions from Step 1.
- Aisle and turning room. Leave a clear aisle wide enough for your widest cart or hand truck, plus room to turn it.
Here's how that plays out in different operations:
- A full-service restaurant with daily produce and protein deliveries may need less total volume, but tightly organized, high-turnover shelving near the door.
- A school kitchen that receives larger, less frequent deliveries needs greater volume during peak weeks, and often more freezer space than the daily menu suggests.
- A high-volume operation, such as a commissary or arena, that moves product on pallets or rolling racks needs wider aisles and door openings sized for that equipment.
The largest box that fits the room isn't automatically the right one. Every cubic foot still has to be cooled, and a walk-in laid out around how product moves holds more usable inventory than a bigger one that isn't.
Step 3: Design around workflow and access
Place the door where product enters and leaves most often, usually on the route between receiving and prep. Keep the most-used items closest to the door, and size the door and aisles for the carts and racks your team actually uses.
- Door location. Put the door on the side facing the busiest route, not the side that's easiest to build.
- Door swing and opening. Confirm the swing clears nearby equipment and foot traffic, and that the opening fits your carts, racks, or pallet jacks.
- Traffic patterns. Map how product moves from receiving into storage, from storage to prep, and back again.
- Combination layouts. If you need a cooler and a freezer, decide which one you enter through and which one your team visits more often.
- Glass-door access. For grab-and-go or front-of-house service, consider glass doors that let staff restock from inside the walk-in.
- Interior layout. Keep high-turnover product near the door and slower-moving stock deeper inside.
Why custom dimensions matter
When the space is tight, every inch counts. A walk-in offered only in standard sizes forces you to round down to the next box that fits, and the leftover inches become dead space against the wall.
Thermo-Kool builds walk-ins in one-inch increments, so the design can fit your room, racks, and door placement. Every walk-in is also preassembled and inspected at the Laurel, Mississippi, facility before it ships, so the panels are confirmed to fit before they reach your site.
Before you lock in a layout, it's worth reviewing common walk-in design mistakes and how to avoid them.
Step 4: Plan for performance, technology, and future needs
Once the footprint and layout are set, choose the systems that protect what's inside: insulation, monitoring and alarms, flooring, and refrigeration. Then plan for the operation you'll run five years from now, not only the one you run today.
- Insulation and panels. Confirm panel thickness and insulation type, since they affect both temperature performance and interior space.
- Monitoring and alarms. Decide who needs to know when temperature drifts, power fails, or a door is left open. Walk-in monitoring watches for all three around the clock.
- Flooring. Match the floor to what rolls across it, from hand carts to fully loaded racks.
- Refrigeration. Confirm the refrigerant and system meet current A2L refrigerant requirements for new equipment.
- Specialized cooling. If you batch-cook, consider an integrated blast chiller built into the walk-in. A single-rack unit uses 19 square feet inside the walk-in instead of separate kitchen floor space.
- Growth. Account for menu changes, enrollment or volume growth, added service periods, or a future freezer compartment.
Each of these is its own decision. For a closer look at what to compare, see the top features to consider in a walk-in cooler or freezer.
Your Pre-Quote Walk-In Design Checklist
Bring these answers to your quote request. They give your rep what's needed to design the right walk-in the first time.
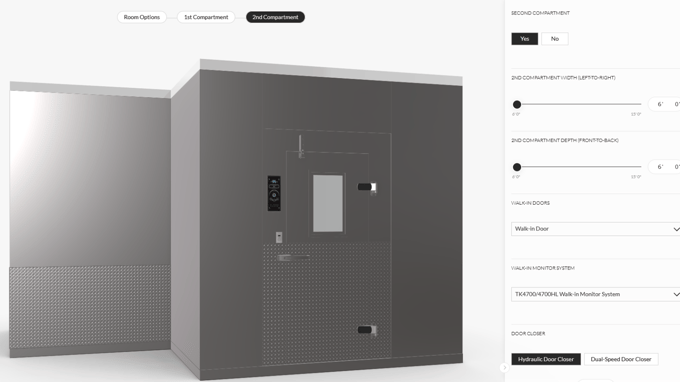
With these answers in hand, you can start designing your walk-in around your own space, right from your desk, in Thermo-Kool's 3D Configurator.
Frequently Asked Questions About Walk-In Cooler Design
How do I size a commercial walk-in cooler?
Start with your peak inventory, delivery frequency, and shelving needs, then fit them inside the space you have. Subtract the wall, floor, and ceiling thicknesses from the exterior dimensions to determine the usable interior area, and leave a clear aisle for carts.
How much walk-in storage do I need?
Enough for your busiest stretch, plus room to move. List what you hold after your largest delivery or before a peak period, convert it to shelving, and add aisle space for your carts or racks to move and turn.
What should I consider when designing a walk-in freezer?
The same factors as a cooler, plus an insulated floor, a door location that limits how often the freezer is opened, and monitoring that alerts you quickly to temperature or power problems. If you need both, decide whether the freezer opens into the cooler or directly into the kitchen.
Where should walk-in cooler doors be located?
On the side facing your busiest route, usually between receiving and prep. Check that the door swing clears nearby equipment and that the opening fits your largest cart or rack.
What is the difference between interior and exterior walk-in dimensions?
Exterior dimensions are the space a walk-in occupies in your building. Interior dimensions are the usable storage inside, after subtracting the thickness of the walls, floor, and ceiling.
Start designing a walk-in around your space, your product, and your team, right from your own desk:
